

Prepaid eSIM Plans Explained: How to Choose, Activate, and Save on Global Data
Prepaid eSIM is the easiest way to skip the physical SIM card hunt and get online instantly. You simply scan a QR code from a provider, and your phone downloads a digital profile with a data plan already loaded. Since it’s prepaid, you pay upfront for a set amount of data or days, then top up or replace it whenever you run low. That means no contracts, no waiting in store lines, and total control over your connectivity—just pick a plan, activate, and you’re good to go.
What Exactly Is a Prepaid eSIM and How Is It Different From a Physical SIM?
A prepaid eSIM is a digital SIM card you buy upfront with a data or call allowance, then install directly onto your phone’s built-in chip—no plastic card required. The key difference from a physical SIM is that an eSIM is embedded and reprogrammable, so you can switch between prepaid plans from different carriers without swapping trays. With a prepaid eSIM, activation is instant via a QR code or app, and you keep your existing number for calls while using the eSIM for data—great for travel. What if you lose your phone? You simply re-download your eSIM profile to a new device, whereas a physical SIM would need a replacement card. Plus, a prepaid eSIM uses zero physical space, letting you add a second line even on single-SIM phones.
The Simple Breakdown: No Plastic Card, Just a Digital Profile

The simple breakdown is that a prepaid eSIM ditches the plastic entirely—your carrier info lives as a digital profile downloaded straight to your phone’s chip. No fumbling with a tiny tray or waiting for a card to ship; you scan a QR code or tap an app, and the profile installs in minutes. That’s it—no physical swap, just software. You manage it like any app: delete it to cancel, or switch profiles when traveling. Activation becomes instant, and the profile stays tied to your device, not a piece of plastic.
Q: What happens if I reset my phone? Your digital profile may disappear, but most providers let you re-download it from your account—no card needed.

Prepaid vs. Postpaid eSIM: Which One Puts You in Control?

Prepaid eSIMs put control directly in your hands because you fund the account upfront, meaning there is zero risk of bill shock or surprise overage charges. With postpaid eSIMs, the carrier tracks usage and bills you later, which often requires a credit check and locks you into a recurring contract. Prepaid allows you to choose a data package, monitor consumption in real time, and top up only when needed, while postpaid may offer more flexible financing but demands ongoing trust in the provider’s billing accuracy. For travelers or temporary setups, prepaid eSIM clearly offers superior autonomy since you can abandon it instantly without termination fees. Postpaid, however, grants more control over long-term multi-line management, but prepaid eSIMs provide immediate, self-directed data ownership for budget-conscious users.
How Does a Prepaid eSIM Work on Your Phone?
A prepaid eSIM works by downloading a digital profile directly onto your phone’s embedded chip, eliminating the need for a physical SIM card. After purchasing a plan, you scan a QR code or enter an activation code, and the profile installs instantly. Your phone then connects to the carrier’s network, using the prepaid balance for data, calls, or texts. Prepaid eSIM activation is typically immediate, and you can manage usage through your phone’s settings, where you switch between multiple profiles. Because the eSIM is rewritable, you can erase the profile or top up credit without changing hardware, making it ideal for travel or temporary connectivity. There is no contract, and network access stops when your credit runs out, but you can recharge online in seconds. The process is fully digital, so you stay connected as long as your prepaid eSIM has data remaining.

The Activation Process: Scanning a QR Code vs. Manual Entry
Activating a prepaid eSIM typically begins by scanning a QR code supplied by your carrier, which auto-fills the necessary profile details. This is the fastest method, as it takes seconds and reduces typographical errors. Alternatively, manual entry requires you to type the activation code and SM-DP+ address into your phone’s cellular settings. While scanning is more convenient, manual entry serves as a fallback if the QR code is damaged or unavailable. Both methods achieve the same result, but scanning is generally recommended. The activation process via QR code is streamlined, whereas manual entry demands meticulous input of a long alphanumeric string.
Q: What happens if my QR code scan fails during prepaid eSIM setup?
A: You can switch to manual entry by locating the activation details in your carrier’s email or app, then typing them into the “Add eSIM” menu under cellular settings. This ensures you can still provision your eSIM without the code.
Understanding Data Pools, Validity Periods, and Top-Up Mechanics
When you buy a prepaid eSIM, the data often arrives in a shared data pool, meaning multiple devices on one account draw from the same allowance—drain it on your tablet, and your phone’s speed drops immediately. Each plan carries a hard validity period (e.g., 7, 15, or 30 days), after which leftover gigabytes vanish, so match the window to your trip’s exact length. Top-up mechanics are straightforward: most providers let you add data mid-cycle, but the new package usually resets the clock to a fresh validity period, not extend the old one. If you top up early, you’ll likely forfeit remaining balance from the previous cycle.
- Check whether your eSIM’s data pool is shared across devices or single-device only.
- Set a calendar reminder two days before the validity deadline to avoid wasting paid gigabytes.
- When topping up, confirm if the new validity period starts immediately or after the current one lapses.
- For multi-destination trips, purchase separate pools per region instead of one large plan.
Why Switch to a Prepaid Digital SIM for Your Next Trip?
Switching to a prepaid eSIM for your next trip eliminates the frantic hunt for a physical SIM at airport kiosks. You can purchase and activate your data plan before you even board, ensuring you’re connected the moment you land. Unlike roaming, a prepaid eSIM offers transparent, fixed pricing, preventing bill shock while you navigate new streets. It’s also incredibly simple: scan a QR code and you’re online, without juggling tiny plastic cards or risking damage to your phone’s SIM tray. You can even keep your primary number active for calls, while the prepaid eSIM handles data, giving you flexibility in one device. The best part? You can switch between local networks or top up data directly from an app without visiting a store, making connectivity truly on-your-terms.
Instant Connectivity the Moment You Land—No Airport SIM Hunt
The best part of a prepaid eSIM? You ditch the airport SIM hunt entirely. Instead of landing groggy and joining a chaotic queue for a plastic SIM, you’re online the second your plane’s doors open. Just switch off airplane mode, and your eSIM profile—bought and installed before you left—activates automatically. No hunting for a vendor, no passport photocopying, no wrestling with a tiny SIM tray. Instant connectivity the moment you land means your ride-share is booked, your maps are loaded, and you’re messaging “I’m here!” while everyone else still waits in line. It’s that simple:
- Buy and install the eSIM pre-trip.
- Land, disable airplane mode, and pick your eSIM line.
- You’re live—zero stalls, zero stress.
Keeping Your Primary Number Active While You Use a Local Data Plan
Your primary SIM stays dormant for calls and texts, but that doesn’t mean it goes dark. With a prepaid eSIM handling data, you can keep your home number active for essential two-factor authentication and iMessage or WhatsApp verification, all without racking up roaming fees. Simply disable cellular data on your primary line and enable it on the eSIM, while keeping the primary line “on” for SMS. This setup preserves **uninterrupted access to banking and app logins** while your local plan covers navigation and browsing.
Will I still receive SMS on my primary number with an eSIM active? Yes, as long as your phone supports dual SIM standby and your carrier allows Wi-Fi calling fallback, you’ll get texts over the local eSIM South Africa network without extra charges.
What Should You Look For When Choosing a Prepaid eSIM Plan?
When choosing a prepaid eSIM plan, prioritize **coverage depth** over sheer breadth—check that the network includes the specific countries you’ll visit, not just popular hubs. Compare **data allowances with your actual usage habits**, especially if you stream or hotspot, since “unlimited” often throttles after a hard cap. Crucially, verify the plan’s **activation and top-up flexibility**: look for instant QR delivery, easy balance management from a phone app, and the option to add data mid-trip without buying a new eSIM. Also, confirm the validity period aligns with your travel length, avoiding plans that expire days before you return. *A slightly pricier plan with transparent renewal rules beats a cheap one that locks you out when you need connectivity most.* Finally, scan for tethering permissions and customer support availability—real-time help matters more than flashy marketing. Choose plans that let you monitor usage live, ensuring you never run dry unexpectedly.
Coverage Maps, Network Speeds, and the Fine Print on Throttling
Before buying, cross-check the provider’s coverage map against your actual travel route, not just the country—rural train rides often fall into dead zones. Prepaid eSIM speeds vary dramatically: a map showing “4G LTE” might mean 5 Mbps in one region and 20 Mbps in another, so look for user-tested speed reports. Most critically, read the fine print on throttling—many plans advertise “unlimited” but cut you to 128 kbps after 5 GB, making video calls impossible. Also, verify whether throttling resets daily or monthly, and if hotspots share your data cap. A cheap plan with hidden speed caps costs you more in frustration.
Coverage maps show where you can connect, speeds reveal how well you’ll work, but throttling terms decide if you’ll actually enjoy either—always verify all three before purchase.
Data-Only vs. Voice-and-Data Packages: What Your Travel Style Demands
Choosing between a **data-only eSIM and a voice-and-data package** really comes down to how you communicate on the road. If you’re a digital nomad who relies on WhatsApp, Google Maps, and streaming, a data-only plan is cheaper and simpler—just pop it in and go. But if you need to call local restaurants, banks, or taxis (where apps aren’t universal), a voice-and-data package saves you from awkward Wi-Fi hunts. For short city breaks, data-only usually wins; for long-term stays or remote areas, voice matters. Match the plan to your calling habits, not just your scrolling habits.
Step-by-Step Guide to Installing and Managing Your Prepaid eSIM
To install your prepaid eSIM, first confirm your phone is carrier-unlocked and eSIM-compatible, then scan the QR code from your provider’s email or app—this takes under two minutes. After activation, manage your plan by opening your device’s cellular settings: assign the eSIM to data, set a default line for calls, and enable “Data Roaming” only when abroad. Top up directly from the provider’s portal, which updates balance instantly, and track usage via their dashboard to avoid surprise cutoffs. To switch plans, delete the old eSIM profile and reinstall a new QR code—your number stays intact if you backup the profile first. Mastering the install flow and settings panel prevents wasted credit and keeps you connected exactly when needed.
The real leverage is pre-loading a backup eSIM profile before travel—switching takes minutes, not hours, at your destination.
Checking Device Compatibility Before You Buy
Before purchasing a prepaid eSIM, verify that your smartphone is both carrier-unlocked and supports eSIM hardware. Check your device’s IMEI number by dialing *#06#; if an EID (Embedded Identity Document) appears, eSIM capability exists. Cross-reference this against the prepaid provider’s compatibility list, as some budget and older models lack the required chip or restrict eSIM to certain regions. Additionally, confirm that your phone’s firmware is updated to the latest version, since manufacturers often enable eSIM functionality through software patches. Finally, ensure your device supports the specific frequency bands for the destination network, particularly if traveling internationally. Skipping this verification risks purchasing a data plan that will not activate, forcing a refund or hardware change.
Installing the eSIM, Troubleshooting No-Signal Issues, and Switching Profiles
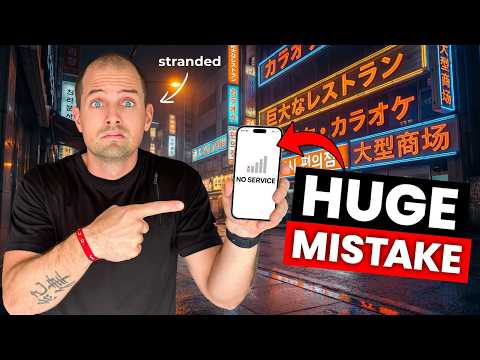
After purchase, installing the eSIM takes minutes: scan the QR code from your provider’s email under *Settings > Cellular > Add eSIM*, or enter the activation code manually if the scan fails. If no signal appears post-install, toggle airplane mode, then manually select your carrier’s network in the same menu; also verify the eSIM line is enabled, not the physical SIM. Roaming toggles often cause silent failures, so switch data roaming on even for domestic travel. Switching profiles is instant—open the cellular menu, tap the prepaid line you want active, and set it as default for voice and data, but remember only one profile can carry data at once. Always download the provider’s app for access to instant profile switches, and restart your device after each change to refresh registration.
Common Prepaid eSIM Questions Beginners Always Ask
Beginners almost always ask whether a prepaid eSIM will wipe out their physical SIM, but the answer is no—you can keep both active simultaneously for calls and data. Another frequent question is how to top up, and the key is understanding that most prepaid eSIMs use a data-only balance, so you must buy a new package from the provider’s app or site before the current one expires, not after. People also wonder if installation is risky; it’s simply a QR code scan, and you can delete it without affecting your phone’s hardware. However, the trickiest part is realizing that your phone number stays tied to the original operator, so emergency texting to short codes may not work on the eSIM. Finally, always check the coverage map for your exact travel region, because prepaid eSIMs often route through a local partner network, not the one you’d expect. Ask about the validity period, too—most start counting from the moment of activation, not purchase.
Can You Top Up or Extend a Plan Mid-Trip Without a New eSIM?
Yes, most prepaid eSIM providers let you top up or extend your plan mid-trip without issuing a new eSIM, provided the original package hasn’t fully expired. You access your account dashboard or the provider’s app, select the active eSIM, and choose a data add-on or extension. Topping up directly reuses your existing eSIM profile, avoiding QR re-scanning or installation. The process typically follows this sequence:
- Log into your provider account and locate the active eSIM.
- Pick a top-up or extension bundle, then pay.
- Confirm activation, which applies instantly or after current data depletes.
One caveat: some plans lock extensions to a maximum duration or limit top-ups to data-only, not voice. Check the expiry terms before purchasing, as a rigidly expired eSIM may require a new installation instead of a simple extension.
What Happens if You Run Out of Data or Delete the Profile by Accident?
If you run out of data on a prepaid eSIM, the connection stops, but the profile remains intact, so you can simply buy a new data package or top-up from your provider’s app or website. Deleting the profile by accident, however, is different: the eSIM is erased from your device, but your subscription and remaining balance stay linked to your account, not the phone. To restore it, you must re-download the original QR code or installation link from your provider’s portal. Recovery after accidental deletion depends on your provider’s reissue policy, though most allow free reinstallation within the validity period. If the QR code expires, you may need to contact support to generate a new one. Follow this sequence:
- Log in to your eSIM account
- Locate the subscription and request a reinstall link
- Install the new profile and verify the IMEI matches
Data depletion never deletes the profile, so recharging is always simpler than recovery.